flourishwithg

Search Results
70 results found with an empty search
- Sandwiches de pollo Salvadoreños (Salvadoran chicken salad sandwiches)
Get ready to to fall in love with a new type of chicken salad sandwich There are plenty of chicken salad sandwich recipes on the internet, but don't discard this one just yet. I consider this recipe a snack—let me explain why. This sandwich is typically made for special events such as family gatherings, birthday celebrations, and throughout the holidays. It's that snack you either have before your main meal, or you eat one—or four—throughout the evening after dinner. Don't judge. The best sandwich de pollo I've ever had is my Tía Ana's. Her chicken salad is so simple but full of flavor. I think many people in our family strive to make it as good as hers, but they've all kind of given up, and we all depend on her to make them. Now it's my turn to try until I get it down. And yes, I asked her for her recipe! So, here we go! What are Sandwiches de pollo Salvadoreños? (What is a Salvadoran Chicken salad sandwich?) I've grown up knowing it as a sandwich de pollo , although the name may change a bit depending on the region. In some areas, what I know as panes rellenos or pan con pollo is referred to as sandwiches de pollo . I'll share the panes rellenos recipe later—no need to worry! Sandwiches Salvadoreños are made with seasoned shredded chicken (or leftover turkey) and a mix of cooked, shredded cabbage and carrots. This is all mixed with mayonnaise and a little bit of mustard. It's then assembled into a white bread sandwich and wrapped up in a napkin—ready to eat. Yes, a napkin. No dirty dishes here. How to make Sandwiches de pollo Salvadoreños? (How to make Salvadoran Chicken salad sandwich?) You can be creative and save time with this recipe, or you can choose to go all out and make everything from scratch! My goal with this recipe was to use the minimum amount of dishes and time. This makes 14 well-filled sandwiches (as they should be). Helpful Kitchen Tools: Good chopping knife or cabbage slicer Peeler and grater Wok or large sauce pan Big mixing bowl Ingredients For the Chicken: 1 whole chicken (rotisserie or cooked from scratch) 1 bell pepper, diced 1 white onion, diced 2 tomatoes, diced 1 tbsp olive oil 4 tbsp butter (divided) 1 tbsp chicken bouillon 1 tbsp garlic powder (divided) Salt & pepper to taste 1/2 cup water or chicken broth For the Salad Mix: 2 carrots, peeled and shredded 1/2 head of green cabbage, shredded 3/4 cup mayonnaise (or to taste) 1 tbsp yellow mustard (or to taste) Instructions Prepare the Vegetables: Dice the bell pepper, white onion, and tomatoes into 1/2-inch pieces. Sauté the Veggies: Heat a pan over medium heat. Add the olive oil and 1 tbsp of butter. Once melted, add the diced vegetables, 1/2 tbsp of garlic powder, and salt and pepper to taste. Stir, cover, and reduce heat to medium-low. Let simmer for 15 minutes, or until tender. Shred the Chicken: While the vegetables cook, shred the chicken. Remove all skin, cartilage, fat, and bones. Use only finely shredded clean meat. Combine Chicken and Veggies: Once vegetables are soft, add the shredded chicken. Season with 1 tbsp chicken bouillon, 1/2 tbsp garlic powder, salt and pepper to taste, and 1/2 cup water or broth. Mix thoroughly. Taste and adjust seasoning as needed. Cover and simmer on medium-low for 15 minutes. Prepare the Cabbage and Carrots: While the chicken mixture simmers, peel and shred the carrots and cabbage. Cool the Chicken Mix: Once cooked, transfer the chicken mixture to a large mixing bowl to cool. Cook the Cabbage and Carrots: In the same pan, melt the remaining 3 tbsp of butter. Add shredded cabbage and carrots. Season with salt and pepper to taste. Cook on medium-low, stirring constantly until cabbage becomes translucent. Combine Everything: Add the cooked cabbage and carrots to the bowl with the chicken. Mix well and let cool for 15 minutes. Finish the Salad: Add mayonnaise and mustard. Mix until evenly coated. Taste and adjust with more mayo, mustard, salt, or pepper as desired. Chill in the fridge for at least 15 minutes before assembling. Assemble the Sandwiches: Spoon the chicken salad mixture onto sandwich bread. Serve on a plate or—if you're feeling nostalgic—wrap in a napkin just like they do in El Salvador. Enjoy! Tip: One day old sandwiches taste amazing, you can reheat them in the air fryer! Store any leftovers in the fridge and enjoy the next day cold! Also, if you want to save time you can buy already shredded cabbage and carrots. If you try please let me know how you like it! As always for daily recipes follow me on IG or TikTok: @flouwishwithg and sign up for our email list.
- Nuegados Salvadoreños de Yuca (Salvadoran cassava fritters with brown sugar syrup)
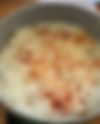
Indulge in a sweet Salvadoran treat that only requires 7 ingredients This recipe is not for those who don’t consume sugar. If that’s you—abort! Now, if it’s just us—the ones who indulge in something sweet once in a while—let me tell you about this recipe. Nuegados Salvadoreños de yuca or cassava is one of my two favorite Salvadoran desserts (the second is empanadas de plátano ). My mom and my tías have made these for as long as I can remember, and they’re best served freshly fried and topped with a brown sugar syrup. You only need six ingredients, four of which are very common—you probably already have them in your kitchen. What does cassava taste like? If you’ve never had yuca , you’re in for a treat. I often compare it to a potato. It’s incredibly versatile—you can make endless dishes, snacks, and sweets with it. This recipe calls for the yuca to be finely processed so that, when it’s fried, it melts together and creates a texture kind of like... melted cold cheese? The most common recipe in El Salvador includes Salvadoran hard cheese ( queso duro ), flour, and eggs. However, growing up, my mom only used two things for nuegados : fresh yuca and salt. I’ve tried versions with the extra ingredients, but I’m not the biggest fan of the cheese flavor—so I stick to the simple recipe my family has always made. I’m not going to lie to you—the syrup is what makes the nuegado and ties all the flavors together. If you gave me a nuegado by itself, I’d eat it, but I wouldn’t be nearly as excited. So please—don’t skip the syrup if you’re going to try this! Ingredients (All links are affiliated) Fresh yuca: It's a root and you should be able to find in your local grocery store. It's normally in the area where you can find your ginger, turmeric and other roots. Salt 1 Cinnamon sticks 1/2 Brown Sugar or Piloncillo/panela: unprocessed cane sugar. This item is normally in the Latin America isle or International isle of your grocery store. If you can't find it at your local store you can find it on amazon as well for the same price. 1/2 tbsp Pure Vanilla extract Vegetable oil 1 cup of water Optional: Salvadoran hard cheese Optional: 1 egg Optional: 1 tsp baking powder How do I make nuegados Salvadoreños de yuca, G? First thing is first! Make the syrup, that way when your nuegados are done frying you can serve them fresh. Kitchen tools: Blender or food processor Knife Cutting board Small sauce pan Small-medium frying pan Syrup: Place a small pot on medium heat Carefully break your piloncillo into small pieces. The smaller the better so that it melts fast, otherwise it will take a bit longer to get it melted down. Pour in a cup of water, half of the piloncillo, 1 cinnamon stick and 1/2 tbsp of vanilla into the hot sauce pan Stir it everything until the piloncillo fully melts and the consistency desired. I like it to be similar to maple syrup consistency. Once done set aside to cool Nuegados: Cut your yuca root into small pieces and peel. The piece pictured above made 10 nuegados. Once peeled cut into half inch small pieces so it's easier for your processor or blender to grind down. Process the yuca and add a pinch of salt. The consistency should be similar to the picture show on the right. If you want to add cheese, or baking powder, add them before processing. Once the yuca is processed, place some Saran Wrap down on a cutting board and start shaping the mix into round patties. Place the patties on the Saran Wrap so that they don't stick. Grab your frying pan and pour in vegetable oil and set it on medium heat. It has to be enough, to cover the patties half way. Once oil is hot, place the patties. You will fry them for three minutes on each side or until golden brown. Once done set them on a rack to slightly cool for about 2 mins. How do I eat nuegados? You can eat nuegados in a couple of different ways. My favorite option is to dip the nuegado in the syrup... probably the most dangerous one. Second option is to pour the desired syrup amount on top. Another common way you may find at some Salvadoran restaurants is the nuegado drowned in the syrup (Chilate). That is probably my least favorite because the nuegado gets a bit soggy and the crunch is gone. Try all three and see which one you like best. If you try them make sure to post a photo on IG or Ticktock and tags me: @flourishwithg, and follow me on either platform for more recipes!
- Pupusas de harina de arroz (Rice Flour Pupusas)
Pupusa de harina de arroz When you go to a pupuseria in El Salvador a common question you'll get when ordering the pupusas is, "de maiz or de arroz?" Which means "Corn or rice flour?" Pupusas are most popularly known to be made with nixtamalized corn flour but back in El Salvador they are also widely known to be made with rice flour, which is why they'll typically ask you how you want your pupusas made. My preferred way of having a pupusa is with nixtamalized corn flour but ocassionally I crave pupusas de arroz but with specific fillings. My top two fillings for a pupusa made with rice flour are beans and cheese, and loroco and cheese. The process to make the curtiodo, the salsa and even the masa does not change, the only the thing that changes is the flour and water ratio used to make the masa (dough). How to make pupusas de harina arroz? For starters make sure you make all the other main ingredients to enjoy with your pupusa: The curtido, which is a cabbage slaw pickled or sometimes fermented. The salsa, which is tomato sauce. The fillings such as beans, chicharrón and cheese. Instructions on how to assemble a pupusa Ingredients: 2 cups Rice flour (6-8 small pupusas) 1 cup hot water Optional: 1tsp salt Optional: 1/2 cup nixtamalized corn flour (only if you want to make the dough firmer), if you opt to add this, you will also need to add 1/2 cup hot water Instructions: In a water kettle, pot or microwave heat your water. I would warm yp 1 1/2 cups just in case you need a bit more, this will depend on the brand of flour you use. In a large bowl add 2 cups of rice flour, add in any of the optional ingredients and mix. Pour 1 cup of the hot water for each 2 cups of rice flour. If you mixed in nixtamalized corn flour you will need to add a bit more flour. Let it cool down until it’s confortable to start kneading with your hand. Mix everything well and then start kneading with your hand until the dough no longer sticks to the bowl or your hand. Cover and let it rest for 15-20 mins before assembling the pupusas. The rest of the process is the same as with the corn pupusas, if you need a refresh on how to make the fillings, garnishes or assembly, head on over to the “How to make pupusas?” series page here . For the video recipe check us out on Instagram and TikTok @FLOURISHWITHG.
- Make a delicious loroco and Cheese focaccia
Back in September I visited my family in El Salvador and had the chance to try the loroco pizza from Pizza Hut... I was blown away by how good it was! Naturally when I got home, I decided to recreate it but with focaccia bread. Let me tell you, it turned out great! Here’s the recipe for you to try! Ingredients Thus makes a 9x13 inch pan and the full process will take about 4-5 hours. 2 cups water 1/4 cup of honey 2 tsp instant yeast 2 tsp salt 4 1/2 cups all purpose flour 1/2 cup olive oil 2 cups shredded mozzarella cheese loroco Instructions: How to make a loroco focaccia? Warm up the two cups of water and in the stand mixer bowl or any big bowl add in two cups of water. Add in the 1/4 cup of honey and mix well to dissolve the honey in the water. Add in the yeast, mix it a bit, and cover the container with a clean kitchen towel. Let it rest for 10-15 mins until the yeast blooms, you will see bubbles or foam form at the top of the water. Add in the salt and flour. If you are using a stand mixer use the kneading tool (dough hook) and mix it on level 2-3 for about 5 minutes. If you are doing this manually, mix everything in the bowl with a dough whisk until fully incorporated. The dough should be sticky. In a different container add 2 tbsp of olive oil and brush it to cover the bowl. Add the dough and let the dough rise in a warm place for 2 hours or until it's doubled in size. During the winter time I let it rest in the oven with the light on, during the summer since if it's pretty warm I let it sit on the counter top. The earth will determine how fast it rises. Spread about 2 tbsp of olive oil in a 9x13 inch baking dish and prepare to transfer the dough. To transfer the dough, fold the edges to the center until you form a ball and slide it into the baking dish. Once in the baking dish, spread the dough until it covers and touches the edges of the baking dish. Cover and let it rise for about 30-45 mins or until it's doubled in size. Prepare the loroco and chese. In the states it's common to only find frozen loroco, so I like to run the loroco under cold water to remove the ice and then dry it with paper towels. It should be dry by the time we add the toppings to the dough. I suggest you also take apart any big chucks of loroco and if you'd like, you can also chop it into smaller pieces. Preheat the over to 350 degrees. Now the fun part! Once the dough has doubled in size, add the cheese and the loroco, and spread it out. Then rub olive oil on your hands and dimple the dough by sticking your fingers direclty into it. This will cause some of the cheese and loroco to sink into the dough, which is what you want. Place in the oven and bake for 25-35 minutes or until the outside is golden brown and looks a bit crispy. Take it out and let it rest for 10 mins before serving. This specific focaccia is best served when freshly made because of the toppings! Hope you enjoy this Salvadoran infused focaccia! For more video recipes make sure to follow @flourishwithg on Instagram and TikTok!
- Let's make a beginner Chicken Biryani
My best friend, Afrah, is from Pakistan and since I've know her, her mom; mama Saleem, makes chicken biryani every friday. When I lived near mama Saleem's house, I would often hop on over and enjoy a plate. Now that both Afrah and I don't live as near, Afrah has learned to make it and taught me how to make a beginner friendly version of chicken Biryani. Why a beginner version? Becuase it has a lot of spices and ingredients that many may not have so we used Shan Biryani mix box and tried to make it as simple as possible. Ingredients: 1 Shan Biryani mix box 1 yellow onion 3-4 tomatoes 2 tbsp of garlic - You can use garlic paste but fresh garlic is preferred 2 tbsp ginger - You can use ginger paste but fresh ginger is preferred 1-2 Serrano peppers (Optional) 1/2 cup of dahi (plain yogurt, not Greek) 2 cups basmati rice - You can add another 1/2 -1 cup of additional rice to set to the side incase it's too spicy. 1/4 cup Vegetable oil 4-5 cups of water 1 tsp salt Instructions to make Chicken Biryani: Soak the rice in water and let it sit during steps 2-8 Clean the chicken, I do this with water, white vinegar and salt. Prep your veggies: Peel fresh garlic and the fresh ginger, cut the peppers and onions in juliane cuts, and dice the tomatoes into small-medium pieces. If you are using fresh garlic and ginger, make a ginger garlic paste by placing the peeled garlic and ginger in a processor or blender. In a sauce pan, add the onions, cover the pan and let them sautee until translucent and soft. This takes about 3 minutes. Add the tomatoes, cover the pan and let it sautee as well until the tomatoes are reduced. This takes about 3-5 minutes. Add the ginger garlic paste and the bag of seasonings into the pan, mix well and let it stew for about 2 minutes. Add chicken and mix until the chicken is coated with the sauce. Let the chicken stew covered for about 5 minutes and then add the yogurt. Cover and let it cook for 30 mins or until chicken is cooked throughly. While the chicken cooks place a pot at medium heat with 4-5 cups of water. Once the water is boiling add the salt and the soaked rice to the pot. Cook the rice until it's 70% done, remove from the heat and strain it. Butter the bottom of the pot where you boiled the rice. Add half of the rice to the bottom, once the chicken is done add the chicken with the sauce and the serano slices on top. Finish covering the chicken with the other half of the rice and then sprinkle ground annatto on top. If you added extra rice, set a bit of if to the side before you assemble the pot. Cover the top part of the pot with alluminum and then place the lid on the pot. Place the pot at the lowest heat possible on your stove and let it cook for about 10-15 minutes. Once the rice on top is fully cooked, remove from heat and mix the chicken and rice in the put before serving. Enjoy the biryani with a yogurt garlic sauce or your favorie topings like cilantro. This was my first time making it on my own and it was pretty simple and bullet proof method. Of course if you have all the spices you can make your own biryani mix. For more recipes head over to @FLOURISHWITHG on Instagram and TikTok.
- Chicharron de pollo para pupusas (Chicken filling for pupusas)
You want pupusas with a protein but you don't like pork? Not to worry. I got you. The times I have ventured out and tried a chicken pupusa at restaurants in Houston, I've been dissapointed. Most of the time it tends to be shreeded chicken breast mixed in with cheese and they haven't been that flavorfull, so I mad emy own chicken pupusas at home. This recipe is perfect for people that love the pork chicharron pupusas but don't want to or can't eat pork. You will LOVE THIS RECIPE! If you want to see the video recipe head over to Instagram or TikTok . How to make chicken chicharron for pupusas? Ingredients: 2-3 lbs of boneless and skinless chicken thighs 1 tbsp Salt 1 tbsp ground black pepper 1/2 tbsp oregano 1 tsp paprika 1 stp ground cumin 1/2 tbsp chicken buillon 1/2 tbsp adobo 1/2 tbsp garlic powder 1/2 white onion 4-5 garlic cloves 1/2 green bell pepper 4-5 roma tomatoes Instructions: Cut the chicken thighs into 1-1/2 inch pieces Clean the chicken with water, white vinegar, lime and salt... or don't, up to you! Pat it dry and season with all the seasonings listed, cover and let it marinade for min 30 mins in the fridge or overnight! Get a big frying pan and turn to medium heat. Once the pan is hot add the oil, once it's hot add the chicken and cook until golden brown. Make sure the chicken pieces are spread out and don't pile them in. If your pot is smaller you may have to do this step in multiple batches to allow the chicken to fry. Once the chicken gets to the perfect golden brown turn off the heat and place the chicken to drain on a frying rack. Cut up the tomatoes, green bell pepper, onions into 1/2 inch pieces and peel the garlic cloves. In the same pan add in your cut vegetables and lightly season with salt and pepper. Cover and let them stew for about 5 minutes or until the tomatoes start to dissolve. Add your chicharron back in and sauté for 10 mins to allow the chicken to stew with the vegetables. This will add a delicious flavor, turn off the heat and let it cool. Once cooled, it's time to process it. You can do this in a processor, blender or if you have a grinder you can use that as well. Process the chicken until it's a rought paste and you can still see tiny bits of chicken. In the same pan you were using, turn the heat to medium and refry the processed chicken. Refry it until golden brown, it will take about 10 mins depending on the amount. Stir it often to prevent the bottom from burning. Take it off the heat, allow it to cool. If you are making pupusas immediately I recommend you put the amount you'll be using in a container and place it in the fridge to cool for about an hour. Anything that you won't be using immediately needs to be stored in air tight containers and placed in the freezer. Divide portions based on how many pupusas you'll make at a time. Normally a cup of chicharron should be enough anywhere btw 6-10 pupusas depending on how much filling you add to each.
- Let's make a delicious budín de pan al estilo Salvadoreño (Salvadoran bread pudding)
Every country has their own version of bread pudding and El Salvador is no different. Growing up I looked forward to seeing left over bread on the counter because I knew it would later become budín de pan, which is bread pudding. My mom always made a very simple version that included bananas but throughout the years of visiting family in El Salvador I've realized that many add a layer a caramel and freash bananas. I'll leave it up to you if you if you want to add the caramel and fresh bananas on top or want to stick with a basic version. If you need video guidence you can find the video recipe on Instragram and Tiktok ! How to make Budín de pan al estilo Salvadoreño: Ingredients for caramel (optional): 1 -1 1/4 cups of sugar 1/4 cups of water Ingredients for bread pudding mixture: 4-6 pieces of three day old pan frances or bolillos. You can also use a full bar of sandwich bread. 3 ripped bananas 5 cups of milk 1 tbsp vanilla Ground cinnamon 2 eggs Raisins (Optional) Instructions: Place a sauce pan on medium heat, add 3/4 cups of sugar and 1/4 cup of water. Stir constantly to prevent the sugar from sticking, it's going to take about 3-5 minutes for the sugar to melt and start caramelizing. Once it has a gold brown color to it, remove it from the heat, add it to your baking dish and spread it in an even coat. Prepare the bread pudding mixture. First, break down the bread into small pieces and add it into a large bowl. Then add the milk on top and let the bread soak for about 5 minutes. Add the vanilla, cinnamon, two bananas and any other ingredients you want to add like raisins. In a separate bowl scramble two eggs and then add it to the rest of the ingredients. Dissolve all the ingredients and mix everything well with your hands. You want the bananas and bread to be mashed down as much as possible. Optional step: Peel and cut one banana into round pieces and add them on top of the caramel layer in the baking dish. Add the bread pudding mix on to the baking dish and bake for 45 mins - 1 hour depending on your oven temperature or until a knife comes out clean. Let it rest for at least an hour before you flip it over. You may have to use a knife to unstick the pudding from the baking dish edges before you flip it onto a serving dish.
- Pupusas de ajo con queso (Pupusas with garlic and cheese)
Last month I travelled to El Salvador for the first time since 2017 and had the blessing of taking my husband with me for his first time ever! During our visit we went to Los Planes de renderos and went to a restaurant where we had pupusas fillid with garlic and chesse. They were life changing for my husband and I, so I naturally had to make my own version at home. How to make garlic and cheese pupusas? Making pupusas has multiple steps but since these are filled with just garlic and cheese it's a much shorter process. However, if this is your first time making pupusas check out the Pupusa series, where I walk you through the process step by step. Before making pupusas read the instructions for each step, making curtido and tomato sauce are optional but i've linked them below as well. Ingredients: 2 cups Masa Harina 2 cups warm water 4 cups quesillo, mozarella or oaxaca cheese. I swear by the mozarella cheese from Sam's Club. 2-3 tbsp of minced garlic 1 tbsp oil Instructions: Make the curtido Make the tomato sauce Make the masa Prepare the garlic cheese filling Peel 1-2 garlic heads, this will be about 10-20 garlic cloves. You can mince it using a mincer, manually with a knife or a processor with a bit of oil. My preffered method is to use a processor, it gives it a better consistency. In a bowl add in the shreeded cheese and the minced garlic. Mix and knead until the cheese is clumpy and the garlic is evenly distributed. You should be able to grab a chunk of cheese without falling apart. Make the pupusa - Making cheese pupusas perfectly can be tricky, you will get these with practice. Mine still bust open from the cheese, so they may not look perfect but they taste heavenly. I hope you enjoy these garlic and cheese pupusas as much as i LOVED eating them! For more recipes follow @FLOURISHWITHG on Instagram, Tiktok, and pinterest!
- Marquesote Salvadoreño (Salvadoran sponge cake)
If you’ve ever explored the culinary scene of El Salvador, you might have come across a delightful and fluffy treat known as marquesote . This traditional cake is not just a dessert; it’s a piece of Salvadoran sweet bread often enjoyed con cafecito or artesenal hot chocolate. Let’s dive into the sweet world of marquesote and discover what makes it so special. What is Marquesote? Marquesote is a light, sponge-like cake that has a unique texture and flavor profile. Its base is made from simple ingredients: eggs, sugar, and flour. However, the magic happens during the baking process, where the eggs are whipped until fluffy, creating that airy, cloud-like consistency. The cake is often flavored with vanilla and a hint of cinnamon. I often like to make tres leches cake with marquesote. How to Make Marquesote While there are many variations, here’s a simple recipe to get you started on making your own marquesote at home: Ingredients: 6 large eggs 3/4 - 1 cup sugar: depends on how sweet you like your bread 1 cup all-purpose flour 1 teaspoon baking powder 1 teaspoon vanilla extract 1/2 tbsp of ground cinnamon Butter or non stick baking spray for the baking pan Instructions Preheat your oven to 350°F (175°C) and grease a cake pan. If you want a thinner version use a 9X13 inch pan, if you want a taller cake use a 8X10 inch pan. Separate the eggs , placing the egg whites in the mixing bowl and the yolks in another. Beat the egg whites until soft peaks form. Gradually add half the sugar, continuing to beat until stiff peaks form. Add the yolks one by one and the remaining sugar to the beaten egg whites. Beat on medium without deflating. Add the rest of the ingredients to the mixuture : vanilla extract, the other half of the sugar, sifted flour, ground cinnamon and baking powder Pour the batter into the prepared pan and smooth the top. Bake for about 25-30 minutes, or until a toothpick inserted into the center comes out clean. Allow to cool before serving Enjoying Marquesote Once your marquesote is ready, it’s time to indulge! Serve it with a side of coffee or artesenal hot chocolate or enjoy it as a standalone treat. It’s also a fantastic dessert to share with family!
- Guacamole as estilo Salvadoreño (Salvadoran guacamole)
Easy to make and full of protein! I was born in El Salvdor so i grew up eating guacamole al estilo Salvadoreño and when I moved to Houston, I was confused by the difference in how they made guacamole. The main difference is that in El Salvador they make is with boiled eggs, onion and the avocado. It's a very simple version but just as delicious as well. I love to eat it with fresh tortilla chips made by cutting handmade tortillas into triangles and deep frying them. It can also be enjoyed on toast or pan frances (french bread)! Ingredients: 2 medium avocados 1-2 oz white or red onion 2-3 boiled eggs Salt and pepper to taste Lime (Optional) Cilantro for garnish Instructions: Boil the eggs and peel them. Once the eggs are cooled, small dice them along with the onion and the avocados. You can dice or just smash your avocado, it's up to you and texture preference. Add salt and pepper to taste and garnish it with chopped cilantro.
- How to make a delicious atol de maíz tostado (Toasted cornflour drink)
This is by far my favorite atol, it's closest to a creamy and hot horchata...? My mom would only make this drink when a fried or family member would bring her the prepped flour mixture from El Salvador but she never made the flour mixture herself. So today we are making it from scratch, and let me tell you, it was a mission! There are two parts to this recipe. First, prepare the flour by grinding the dried corn and second, making the hot drink with the flour. There was a few challenges I had to overcome while making this recipe. The first was to find the dried corn or as you may find it "Maiz seco." I was only able to find it at the Houston Farmers Market, which is historically know for selling produce from Mexico and other countries in Latin America. The second challenge was grinding the corn into a fine powder. Back home in El Salvador, there are public molinos or you tipically know of a neighbor that has one, and you pay a quarter or two for them to grind different grains. Here in Houston I don't think there is anything like this and since i don't own a grinder or grain processor, I used the next best thing... a blender. Oh, boy. I had to process and strain the mixture multiple times in order to get a powder like substance, but I got it done. How to make atol de maíz tostado? Making the flour Ingredients: 4 cups of flour 2 lbs dried white corn 2 cinammon sticks Instructions: Wash and clean the corn - remove any pieces that may look too old or rotten. Drain the water and set it out to dry in a flat container Once it's dry, place a sauce pan or frying pan on low to medium heat. Add the cinammon and corn, and toast until golden dark brown. Depending on the size of the pan, toast it in small batches. If you want the atol to have a darker color, let the corn toast to a dark brown. Once toasted place it in a container to cool off for about 10 minutes. Once cooled add both the corn and cinammon stick to a blender or pulvirizer and process to the finest flour possible. I did it in my Ninja blender and it required a few runs to get it pulvirized. I also had to strain it to leave the big pieces that didn't process and then try it again. The two pounds gave me approximately 4 cups of flour. Making the Atol Once the flour is made, we are ready to make the atol de maiz tostado. Ingredients: Serving for 3- 4 cups 1 cup of four 3-4 cups water: For a thicker consistency add 3 cups of water, for a more thin consistency add 4 cups of water. 1/2 cup of milk 1 cinnamon sticks 1/4 cup sugar or to taste Instructions: In a container add the cup of flour and the desired water. Mix well until fully incorporated. Strain the mixture: First strain the mixture using a mesh strainer, then strain it a second time using a cheese cloth or bag. Place a deep pot on medium heat and add the strained mixture, add a cinammon stick and let it come to a simmer. Mix continuously to keep it from sticking or burning at the bottom of the pot. Add the milk and the sugar, and continously mix until it comes to a boil. If you see it thinken up too much you can add 1/2 a cup of water to thin it out a bit. Let it cool for 5 minutes and serve with some pan dulce. This is best served hot and with a side of pan dulce (sweet bread) or pan frances (frech bread). I hope you all enjoy this recipe as much I enjoyed learning to make it. For more recipes remember to follow @FLOURISHWITHG on Intagram, TikTok and facebook!
- The pupusa series, episode 6: La Masa (Dough)
Most important step that can make or break your pupusas! I must confess this has been the hardest part of making pupusas for me. The first few times I tried to make pupusas the dough part was a bit tough and my mom told me it was because my dough was not soft enough and it needed water. I tried many times after that but the same thing would happen even if I added more water. I have now mastered this step and have updated this post with the lessons I’ve learned. How to make the dough for pupusas? Here are some tips that my mom has given me and that have helped me get a better dough. Use your hands: Kneading the dough will help make sure there is no flour left, evenly distribute the moisture and make the dough soft. We call this "amarsar" in Spanish. This can also be done in a stand mixer, add the ingredients and let it mix for about 4-6 minutes on level 2 or 3 with the dough hook. I only use the stand mixer when I’m making a larger batch. Don't be afraid to add water: Add in a bit of water and knead it for a bit. As you go test your dough and add water gradually until it's to de desired consistency. If you press the dough down and it cracks, add a bit more water and knead it for a few more minutes. Knead the mixture until it no longer sticks to your hands and has the consistency of wet sand. Ingredients: 1 cup white corn flour: you can use your preferred brand but the one most commonly used is Maseca brand 1 tsp table salt (optional) 2 tsp olive oil or any other oil (optional) 1 cup water: Depending on your preferred consistency the water required will depend. I end up using 1 cup of water for my preferred consistency. Instructions: Use a big container that will allow you to knead the dough Add your flour Add your salt and mix it with a dry spoon. This will allow the salt to distribute evenly throughout the flour. Add 1/2 cup of water Add your oil Mix everything with your hands until there is no flour in sight. Add in the other 1/2 cup and knead until all water has been incorporated. Test your dough and add water gradually until your desired consistency.